Commit 837fc7
2026-04-12 16:12:07 cloudy-jc: Rework FreeCAD Extension page: add images and improve worked example layout Add CC-licensed screenshots from Wikimedia Commons (FreeCAD interface, sketch with constraints, padded 3D shape) as OtterWiki page attachments. Break the worked example from a dense numbered list into headed steps with images illustrating the sketch and pad stages. Keeps buddy tone for Year 7 audience. Co-Authored-By: Claude Opus 4.6 (1M context) <noreply@anthropic.com>| FreeCAD Extension.md .. | |
| @@ 14,7 14,9 @@ | |
| FreeCAD is free, open source, and runs on Windows, Mac, Linux and Raspberry Pi. There is no account to make and nothing to pay for. | |
| + |  |
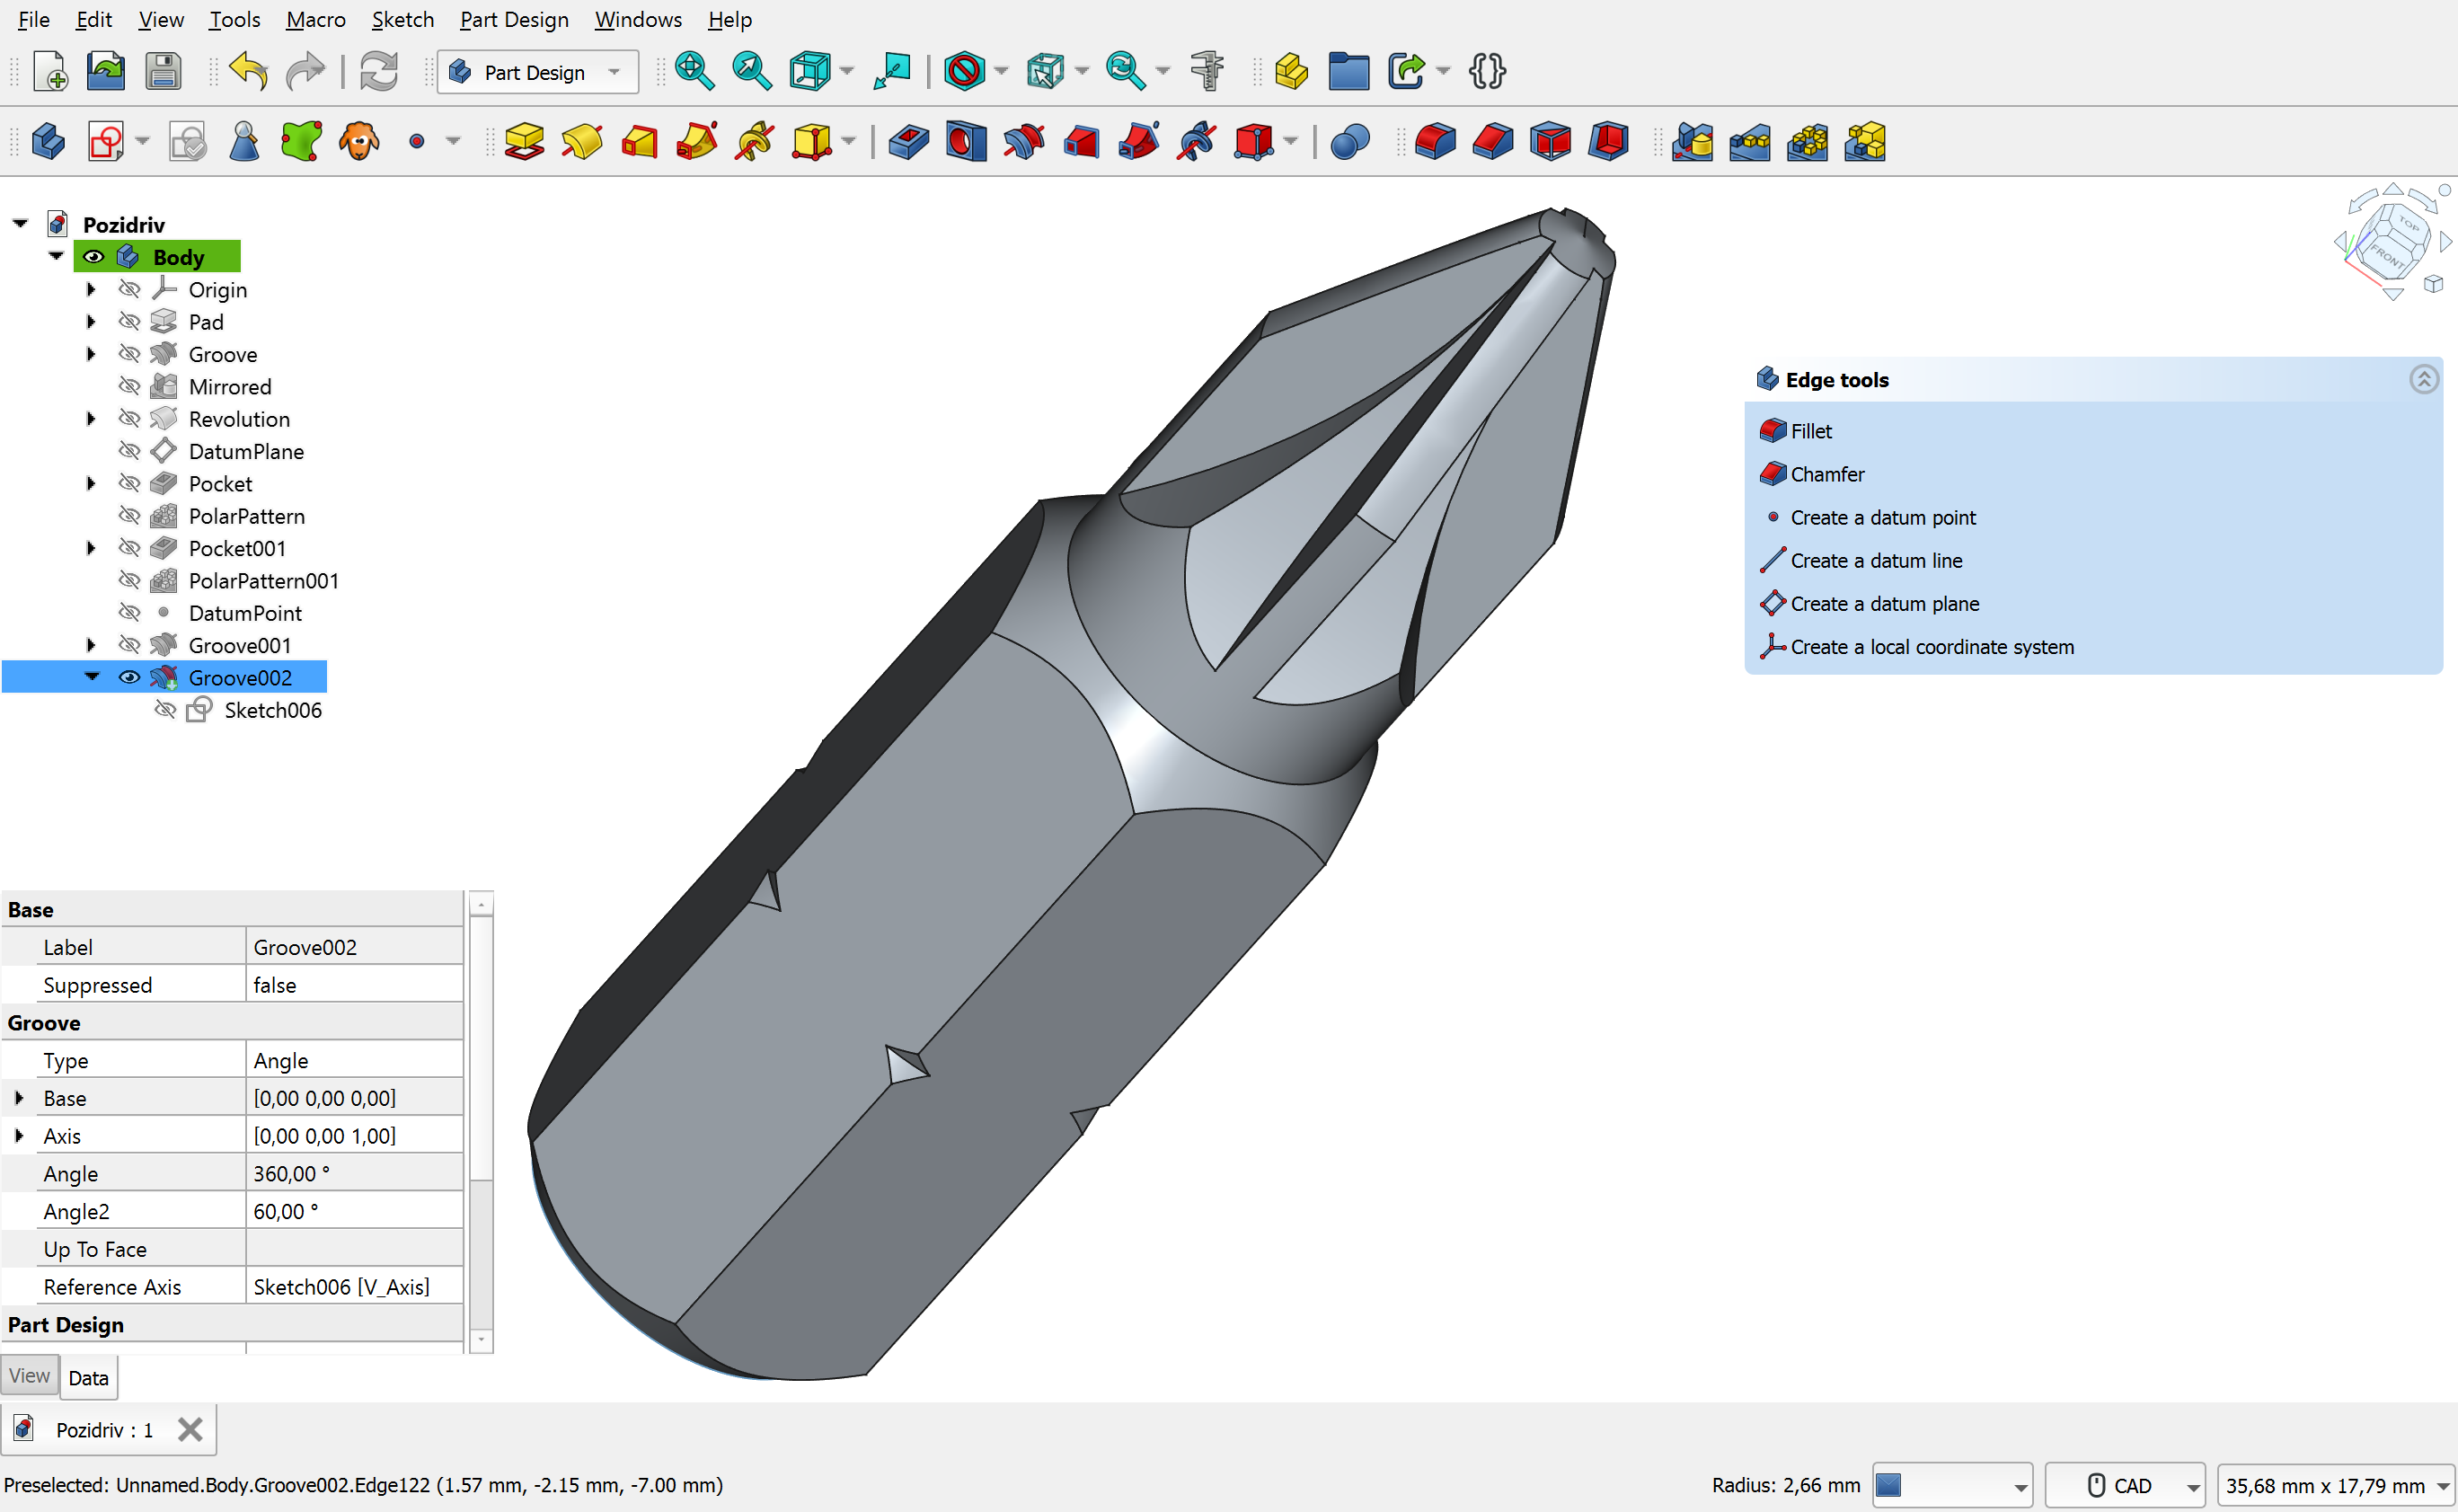
| + | *FreeCAD 1.0 in the Part Design workbench. The tree on the left shows every step used to build the model. Image by Maxwxyz, [CC BY 4.0](https://creativecommons.org/licenses/by/4.0/), via [Wikimedia Commons](https://commons.wikimedia.org/wiki/File:FreeCAD_1.0_Light_PartDesign_Pozidriv.png).* |
| --- | |
| @@ 34,16 36,43 @@ | |
| ## Worked example: a small Sphero hat in FreeCAD | |
| - | Here's what the workflow looks like. Don't try to follow exact clicks from this — use it as a map, then follow the docs linked at each step. |
| + | Here's a quick look at the steps. Don't try to follow exact clicks from this page — use it as a map, then follow the docs linked at each step. |
| - | 1. **New document, Part Design workbench.** File → New, then switch the workbench dropdown to *Part Design*. ([docs](https://wiki.freecad.org/Part_Design_Workbench)) |
| - | 2. **Sketch the circle.** Create a new sketch on the XY plane. Draw a circle. Add a diameter constraint and type the number — say, 80 mm for a hat that sits over a 72 mm Sphero. ([Sketcher docs](https://wiki.freecad.org/Sketcher_Workbench)) |
| - | 3. **Pad it into a disc.** Close the sketch, then *Pad* it upwards by 10 mm. You now have a solid puck. ([Pad docs](https://wiki.freecad.org/PartDesign_Pad)) |
| - | 4. **Pocket out the underside.** Make a new sketch on the bottom face, draw a 72 mm circle, and *Pocket* it up 8 mm. That's the hollow the Sphero sits in. ([Pocket docs](https://wiki.freecad.org/PartDesign_Pocket)) |
| - | 5. **Fillet the top edge.** Use *Fillet* on the top circle of the puck to round it off. Try a 3 mm radius first. ([Fillet docs](https://wiki.freecad.org/PartDesign_Fillet)) |
| - | 6. **Export an STL for printing.** Select the body in the tree, File → Export, and choose STL. That file goes straight into your slicer. ([Export docs](https://wiki.freecad.org/Export_to_STL_or_OBJ)) |
| + | ### Step 1 — Open Part Design |
| - | The payoff: if your hat is too tight, open the first sketch, change 72 to 73, and everything below updates automatically. You don't have to rebuild anything. That's the parametric trick. |
| + | File > New, then switch the workbench dropdown to **Part Design**. This is where you'll do almost all your 3D modelling. ([Part Design docs](https://wiki.freecad.org/Part_Design_Workbench)) |
| + | |
| + | ### Step 2 — Sketch a circle |
| + | |
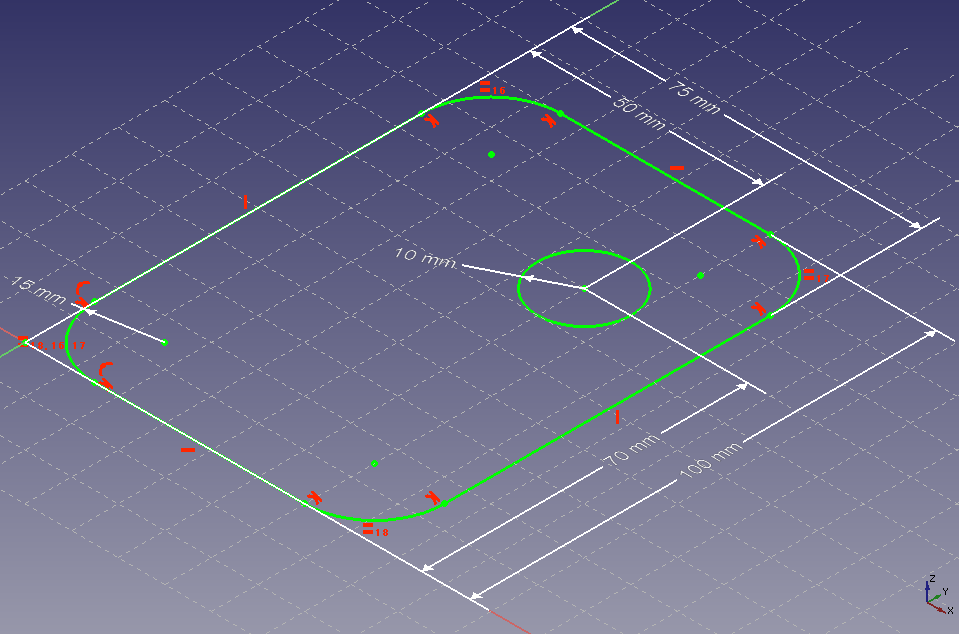
| + | Create a new sketch on the XY plane. Draw a circle, then add a **diameter constraint** and type the number — say, 80 mm for a hat that sits over a 72 mm Sphero. Constraints are what make FreeCAD parametric: the circle isn't just "about that big", it's exactly 80 mm, and FreeCAD remembers that rule. ([Sketcher docs](https://wiki.freecad.org/Sketcher_Workbench)) |
| + | |
| + |  |
| + | |
| + | *A sketch with constraints. The white dimension arrows lock the shape to exact measurements. CC0, via [Wikimedia Commons](https://commons.wikimedia.org/wiki/File:FreeCAD_PartDesign_Sketch.png).* |
| + | |
| + | ### Step 3 — Pad it into a disc |
| + | |
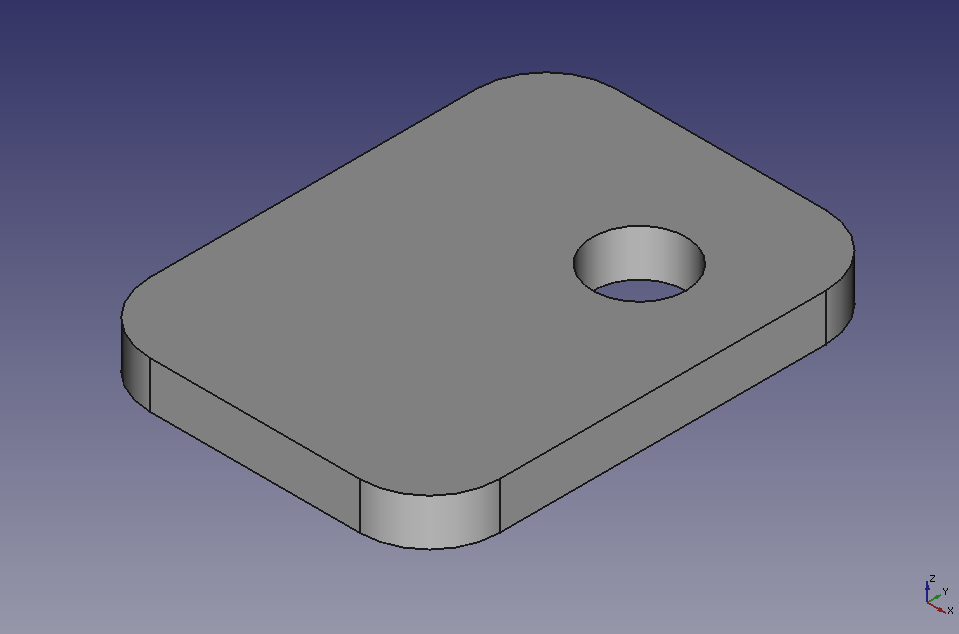
| + | Close the sketch, then use **Pad** to push it upwards by 10 mm. You now have a solid puck — a flat cylinder. ([Pad docs](https://wiki.freecad.org/PartDesign_Pad)) |
| + | |
| + |  |
| + | |
| + | *After padding the sketch, you get a solid 3D shape. CC0, via [Wikimedia Commons](https://commons.wikimedia.org/wiki/File:FreeCAD_PartDesign_Pad.png).* |
| + | |
| + | ### Step 4 — Pocket out the underside |
| + | |
| + | Make a new sketch on the bottom face, draw a 72 mm circle, and use **Pocket** to cut it 8 mm deep. That hollow is where the Sphero sits. ([Pocket docs](https://wiki.freecad.org/PartDesign_Pocket)) |
| + | |
| + | ### Step 5 — Fillet the edges |
| + | |
| + | Use **Fillet** on the top edge to round it off. Try a 3 mm radius first — you can always change it later. ([Fillet docs](https://wiki.freecad.org/PartDesign_Fillet)) |
| + | |
| + | ### Step 6 — Export for printing |
| + | |
| + | Select the body in the tree, File > Export, and choose **STL**. That file goes straight into your slicer (like Cura or PrusaSlicer). ([Export docs](https://wiki.freecad.org/Export_to_STL_or_OBJ)) |
| + | |
| + | ### The parametric payoff |
| + | |
| + | If your hat turns out too tight, open the sketch from Step 2, change 72 to 73, and **everything updates automatically**. You don't have to rebuild a thing. That's the whole point of parametric design. |
| --- | |
| /dev/null .. FreeCAD Extension/freecad-interface.png | |
| /dev/null .. FreeCAD Extension/freecad-pad.png | |
| /dev/null .. FreeCAD Extension/freecad-sketch.png | |