
Raspberry Pi — Setting Up
A companion page to Workshop 1 Hardware and Networks. The general skill: identify each port, identify the cable that fits it, and push them together in the right order.
In Workshop 1 we put a Pi together from a pile of cables. This video walks you through the same six steps in about a minute, so before our next workshop you can build one yourself without help. The same skill works for any desktop computer — every port has a unique shape, and every cable only fits one place.
The Video
A short walkthrough of the six steps: storage → input → display → network → check → power. Power is always last.
The Six Steps
1. Storage
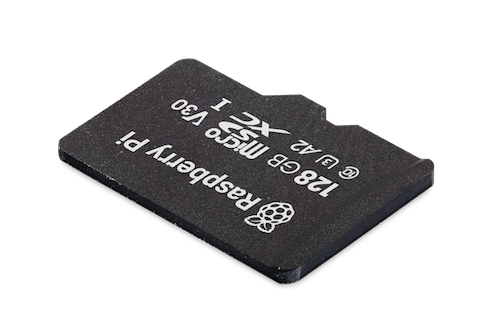
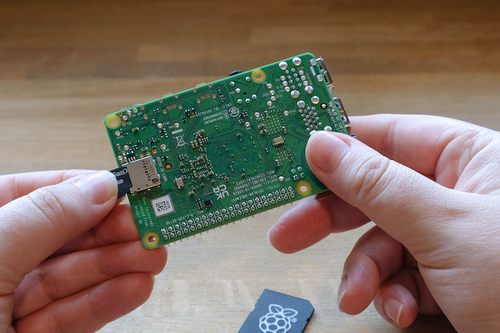
Slide the microSD card into the slot on the underside of the board. This is the Pi's "hard drive" — it holds the operating system.
2. Input
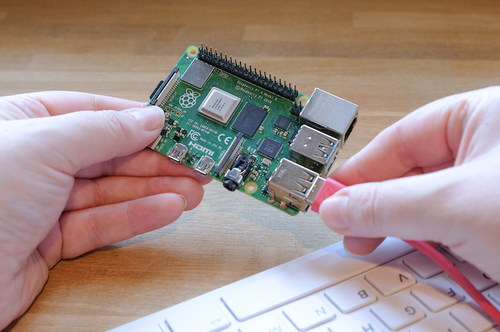
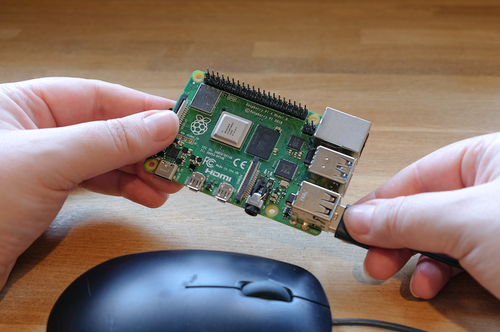
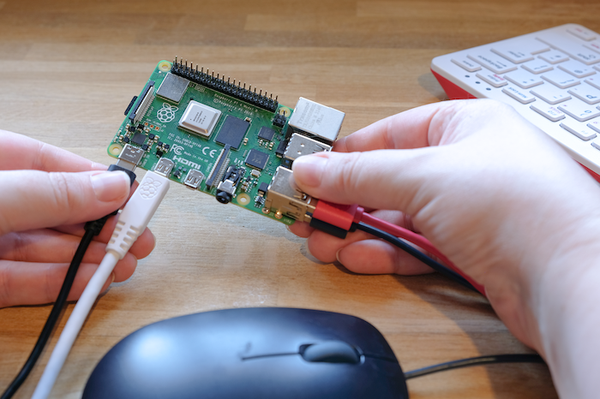
Plug a keyboard and mouse into the USB-A ports — the rectangular ones.
3. Display
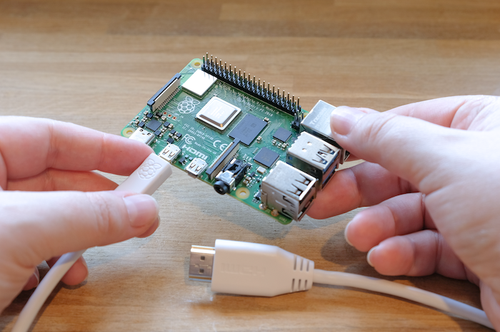
Connect the monitor with an HDMI cable. The Pi 5 uses micro HDMI, so look for the small trapezoid shape.
4. Network
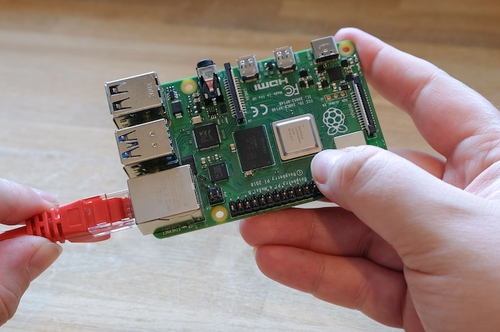
Push the Ethernet cable into the network port until it clicks. (You can skip this step if you'll use Wi-Fi.)
5. Check
Every cable should be in a different port. Each port has a unique shape, so if a cable feels forced, it's the wrong port.
6. Power
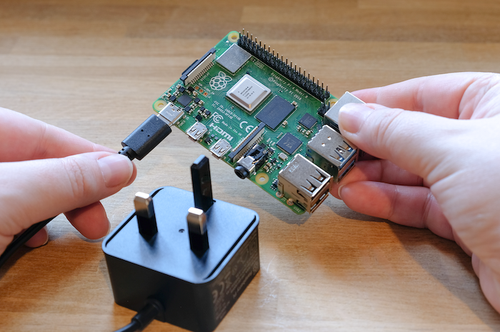
Plug the USB-C power supply in last. The Pi has no on/off switch — supplying power is turning it on.
What to Watch For
- Every port is shaped differently — a USB-A plug physically can't fit into an HDMI port. The shapes are the safety check.
- Micro HDMI ≠ HDMI — the Pi 5 has the smaller version. You need a micro-HDMI-to-HDMI cable (or adapter) to connect to a normal monitor.
- Power is last — if you plug in power before everything else is connected, the Pi boots without seeing the keyboard, mouse, or display, and you'll have to power-cycle it.
- The microSD card is fragile — it goes in contacts up on the underside. Don't force it; it slides in smoothly when oriented correctly.
Have a Go
Your turn! Grab a pen and have a crack at these.
Question ① — Without looking it up, list the six steps in the right order.
Question ② — Why does the Pi 5 use micro HDMI instead of full-size HDMI? (Hint: look at the size of the board.)
⚡ Hint: A full-size HDMI port is bigger than the entire short edge of a Pi 5.
Question ③ — Why do we plug in power last? What goes wrong if you plug it in first?
Question ④ — Pick a desktop or laptop you use at home. Without unplugging anything, can you identify each cable going into it and which step from the list it matches (storage, input, display, network, power)?
Going further
The official Raspberry Pi Foundation guide covers the same steps with more detail and pictures: Setting up your Raspberry Pi. Use it as a reference if you're setting one up at home.
See also: Cable and Interface Quick Guide · Workshop 1 Hardware and Networks · Raspberry Pi Foundation - What Is A Raspberry Pi · Tom Scott - Fetch Execute Cycle
Last updated: May 2026.
← Back to Year 7 Hub